To celebrate what would have been Julia Child's 100th birthday, PBS has made available through their website different shows hosted by Julia Child. Being the dork I am I have been watching these episodes incessantly since I realized they were there. Having access to Baking with Julia, Cooking with Master Chefs and Julia's Kitchen with Master Chefs is an amazing resource. I encourage everyone to watch a couple episodes if they can and get ready to be inspired. It is so valuable to be able to watch incredibly influential chefs like Charles Palmer and Rick Bayless as young lads prepare meals and explain techniques slowly.
I was very inspired by a Baking with Julia episode where she watches Beatrice Ojakangas make classic danishes. I watched the episode probably 10 times without exaggeration. The other day I finally built the courage to try her recipe for myself. Definitely not as simple as the recipes that I have normally written about but the outcome was worth it. I have more dough left and I plan on making this recipe again but adding my own touches. Stay tuned.
In the meantime remember to keep on cooking!
Tuesday, September 18, 2012
Wednesday, September 5, 2012
Grilled peach, chicken and zucchini salad
It has been one crazy summer composed of amazing weddings, graduations, birthdays and spontaneous trips to vacation lands. Unfortunately all the good summer plans and madness got in the way of me cooking. The madness, however, had no effect what-so-ever on how much I was eating. Not to worry.
This week I had a little reunion with my kitchen. As I got to turn off the air conditioner, open the windows and see the first of the leaves falling off the trees I made what I think is a perfect end of summer dish. Simple. Simple. Simple.
Grilled peach chicken and zucchini salad for two.
1 package of spring mix
1 small zucchini cut into half moons.
1 white peach cut into wedges
2 chicken breast. (The pieces I had were so big I ended up only using one for the salad and saved the other for a sandwich the next day.)
1/4 lb mozzarella cut into small thin wedges
1/2 tsp of ground ginger
1 Tbsp Extra virgin olive oil.
salt and pepper to taste
1. Rinse off the spring mix and set aside.
2. Season chicken with ginger, salt and pepper put medium high heat grill about 10-15 minutes per side depending on thickness or until juices run clear. Set aside.
3. Slice the zucchini and toss the pieces with the olive oil and salt and pepper.
4. Put the zucchini and peach slices on a medium heat grill. I put them on for about 4 minutes per side or until crisp tender.
5. Slice chicken and toss all together with the mozzarella, spring mix, peaches and zucchini.
I chose to drizzle a little balsamic vinaigrette on my salad but in the future I might use a ginger dressing. The sweetness from the peaches really softens the bitterness from the greens and adds an amazing flavor to the chicken.
This week I had a little reunion with my kitchen. As I got to turn off the air conditioner, open the windows and see the first of the leaves falling off the trees I made what I think is a perfect end of summer dish. Simple. Simple. Simple.
Grilled peach chicken and zucchini salad for two.
1 package of spring mix
1 small zucchini cut into half moons.
1 white peach cut into wedges
2 chicken breast. (The pieces I had were so big I ended up only using one for the salad and saved the other for a sandwich the next day.)
1/4 lb mozzarella cut into small thin wedges
1/2 tsp of ground ginger
1 Tbsp Extra virgin olive oil.
salt and pepper to taste
1. Rinse off the spring mix and set aside.
2. Season chicken with ginger, salt and pepper put medium high heat grill about 10-15 minutes per side depending on thickness or until juices run clear. Set aside.
3. Slice the zucchini and toss the pieces with the olive oil and salt and pepper.
4. Put the zucchini and peach slices on a medium heat grill. I put them on for about 4 minutes per side or until crisp tender.
5. Slice chicken and toss all together with the mozzarella, spring mix, peaches and zucchini.
 |
| After I decided I was going to make this meal, I realized that we were out of propane. I had to bring out the good ol' cast iron grill pan. This made grilling half moon zucchini much easier. If using outdoor grill would suggest just slicing. If you're anything like me you will lose half of them and the swearing will ensue. |
I chose to drizzle a little balsamic vinaigrette on my salad but in the future I might use a ginger dressing. The sweetness from the peaches really softens the bitterness from the greens and adds an amazing flavor to the chicken.
 |
| Sorry again for photo quality. Had to use my camera phone but I hope you get the idea : ) |
Tuesday, July 3, 2012
Steamed Clams over Sauteed Escarole

I was on the phone with a friend last night explaining how I was trying a new recipe that I wasn't exactly thrilled with but that tasted pretty darn good. I wasn't going to post about it until she reminded me that I should be writing about the recipes I want to improve too. People can learn from my mistakes right?
A few years ago I worked for an Italian restaurant with a rather eccentric and accomplished chef. He would work for hours quietly concentrating on the small details of everything he made. He reminded me of Eeyore and I loved watching him slowly move through his kitchen with such calculated movements. He made the best chicken soup I've ever had, the only one I like more than my own. He made baked semolina gnocchi drizzled with a mushroom cream sauce that I promise to try and recreate one of these days. He was a huge inspiration to me in the kitchen. It was just me for dinner last night so I picked up a head of escarole with the intention of mimicking the sauteed escarole he used to make. I also saw a dozen little neck clams on sale so I brought them home too.
Here's what happened:
1 Dozen little neck clams
1 Head of escarole
1 Tsp kosher salt
2 Tbsp extra virgin olive oil
2 Cloves of garlic - thinly sliced
1/8 Tsp. red pepper flakes
Lemon juice and butter for dressing.
salt and pepper to taste.
I chopped off the end of the escarole and washed the leaves under cold water and let it sit in a colander while I scrubbed the clams clean and sliced the garlic.
In a large pot I set water to boil with 1 teaspoon of kosher salt. Once it was at a rolling boil I put the escarole in for two minutes to par boil. I drained the escarole and let it sit in the colander again. In the same pot I used for the escarole I placed the clams so they were standing in a inch of water and brought the water to a boil.
While the clams were cooking I heated the olive oil in a frying pan. To the hot oil I added the red pepper flakes and sliced garlic. I let the garlic cook for one minute and then added the escarole to the pan to coat with the olive oil and let it cook for two minutes.
The clams are cooked as soon as the open up and by the time the escarole was done most had opened so I made myself a plate. and drizzled lemon juice and a little melted butter over the clams.
So here is the only problem I found the greens were very tasty but a little...wet. In the future I might dry the escarole off on a paper towel or omit par boiling all together and just saute longer. The par boiling did help remove all the bitterness involved with the escarole.

This was a perfectly light but filling dinner for me but I fill easy. Put this on a bigger platter with more escarole and more clams it would make for a really nice family style appetizer.
Friday, June 15, 2012
Blueberry Coconut Granola

Man do I love eating breakfast. I love making Saturday morning French toast or Sunday brunch poached eggs with thick cut bacon but, what about all the other days of the week. Wolfing down a bowl of cereal or grabbing a banana on the way out the door just never really satisfies the way I want it to. I have a solution for weekday rushed breakfast: Sunday night granola. Making the granola the night before takes all the pressure off weekday mornings and you can still have a special homemade breakfast. Having homemade, crunchy- sweet granola will help a Monday feel less terrible. I found a recipe that I switched up a bit and really did the trick. Best part is, it's so freakin' easy.
3/4 Cup sliced almonds
1 Cup of flaked coconut
1 Cup Maple syrup
1/2 Cup brown sugar
2 Tsp Vanilla extract
2 Tbsp Lemon juice
1 Tsp Lemon Zest.
1 Cup of dried Blueberries.
Preheat oven to 350 degrees
1. Combine oats, almonds, and coconut in a large bowl and set aside.
2. In a medium saucepan put maple syrup, sugar, vanilla, lemon juice and zest on low heat. Stir until combined and sugar has melted.
3. Pour syrup mixture over the oats and toss the oats like a salad until well coated.
4. For easy clean-up line a baking sheet with foil and pour the mixture on the sheet.
5. Bake for 10 minutes and stir the granola on the baking sheet and continue to cook for another 10 minutes or until granola is no longer sticky or wet.
6. Let the granola cool on the baking sheet and then add the dried blueberries.
Serve with milk or yogurt and some fresh sliced fruit and you've got a pretty quick and special weekday breakfast.

Friday, June 1, 2012
Parmesan Risotto with Roasted Aparagus

I took a quick
posting hiatus but I definitely haven't stopped cooking.
There are few
things better than a homemade bowl of Parmesan risotto. I tend to
make this risotto about once every other month. It comforts, it
soothes, and when I add a little roasted asparagus I don't feel so
bad about eating a bowl of wine, broth, and cheese soaked rice.
Here's what
happened:
1 Bunch of
asparagus - I only actually use half the bunch and save the rest for
other dishes.
1 Quart of chicken
broth. - Homemade if you have it. I often make this dish after the
chicken process has begun.
1 Small Spanish
onion
2 Cloves of garlic
- minced
1 1/2 Cups of arborio rice
3/4 Cup of white wine - I almost always
use Pinot Grigio for it's crisp clean taste. Use whatever you like to
drink.
1/2 Cup of
Parmesan cheese - grated
Extra Virgin Olive Oil.
Salt and pepper to taste.
For the
Asparagus:
1. Preheat oven to
350 degrees.
2. Drizzle
asparagus with olive oil and salt and pepper to taste.
3. Bake in oven on
a baking sheet for 10-15 minutes depended on the thickness.
4. Take what you
want for the risotto and cut into inch sized pieces.
For the Risotto:
1. Put the chicken
broth in a large saucepan and set to a very low heat.
2. In a medium
heavy bottomed saucepan add two tablespoons of extra virgin olive
oil. To the hot oil add the shallots and garlic.
3. Stir and wait
about 3 minutes before added the rice. Stir the mixture together
making sure the grains are coated with the oil keep stirring for 2
minutes.
4. Add the wine
stir to combine and let the rice soak up the wine.
5. Once the wine
is soaked up add a ladle-full of the chicken broth, a little more
than 1/2 cup. Stir to combine and then allow the rice to do the
work.
6. Repeat this
process, stirring often, until the rice is cooked al dente. This
takes about the entirety of the quart of chicken broth to achieve.
Towards the end of the broth start taking little tastes till you get
the softness you prefer.
7. Once the rice
is done add the cheese and chopped asparagus. I strongly recommend
using freshly grated real Parmesan. It makes a real difference.

Monday, April 30, 2012
Congratulatory Vanilla Almond Texas Sheet Cake

My friend and roommate, originally from Texas, recently got married in his home lone-star state. We were really bummed we couldn't make it down for the wedding but we decided to throw him a little surprise party. What would be more fitting than to make him some good old fashioned Texas sheet cake. I originally had in mind (read: bought the ingredients for and started making) a chocolate sheet cake when I had the sense to ask him if he even likes chocolate cake.
"Making chocolate cake for the blog, don't you just love chocolate cake"
"No, it's not my thing"
New plan.
I quickly searched for a vanilla cake recipe and found a white Texas sheet cake recipe all over the place but I wanted a little less almond flavor.
Here's what happened:
For the Cake
2 Cups of all purpose flour
2 Cups of sugar
1 Tsp of baking soda
1/2 Cup of butter
1 Cup of water
1/2 Cup shortening
1/2 Cup of buttermilk
2 Eggs
1 Tsp of vanilla extract
1 Tsp of almond extract
1 Tsp of lemon zest.
Pre-heat oven to 375 degrees.
Grease and flour a half sheet pan/17in jelly roll pan.
1. In a large mixing bowl, sift together the flour, sugar, and baking soda.
2. Put the butter, water, shortening in a medium sauce pan on a low heat till totally melted and combined. Set aside till a little cooler.
3. In a smaller bowl beat the eggs, buttermilk, extracts and zest together.
4. Add all the wet ingredients to the dry ingredients stir until smooth.
5. Pour batter into prepared half sheet pan spread out evenly (It was very useful to have an angled spatula to make this cake) and set to bake for 20 minutes.
If you are like me, you are confused/concerned that the half sheet is way to shallow to bake a cake. It's not. It is a very thin sweet cake that is quick and great for a crowd.
While the cake was cooling. I made the frosting
For the Frosting:
1 Cup of very soft butter
3-4 Tbsp. of heavy cream.
1 Tsp. of vanilla extract
3 Cups of confectioners sugar.
1. Sift the confectioners sugar in a bowl and set aside.
2. With an electric hand mixer using the whisk attachments whisk the butter, heavy cream and vanilla together until smooth.
3. Adding the confectioners sugar a few tablespoons at a time continue mixing until you've used all the sugar up.

Friday, April 20, 2012
The Chicken Process : Roast Chicken and Broth
.JPG&description=The%20Chicken%20Process%20%3A%20Roast%20Chicken%20and%20Broth "Pin It")
There are a few things I need to cook to make myself happy and roast chicken is one of them. Making roast chicken starts off what I call the chicken process. There are hundreds of roast chicken recipes everywhere and I'mm well aware of how similar they may look to this one but this is the one I've been making the longest. From this chicken I often make broth(recipe below) or use the rest of the bird for other things such as chicken pot pie.
1 Whole 4-5lb organic chicken
2 Tbsp good olive oil
1 Head of garlic - halved
1 Small lemon - in quarters - Sometimes I can only fit half of the lemon, don't worry, there will still be great flavor.
6 Sprigs of Rosemary
6 Sprigs of Thyme
3 Tbsp Kosher Salt
Fresh ground pepper
Pre-heat oven to 375 degrees
1. Wash off the chicken and its cavity and thoroughly dry the outside of the bird.
2. Sprinkle the olive oil all over the top the bird and massage under the skin of the breast.
3. Sprinkle 1 Tbsp of kosher salt and grind some pepper in the cavity.
4. Put 4 sprigs of thyme, 4 sprigs of rosemary, garlic and lemon in the bird. - If you have kitchen twine tie the legs together.
5. Run your knife through the rest of the thyme and rosemary and sprinkle the herb mixture, garlic powder, remainder of the salt and pepper evenly over the bird.
6. Bake at 375 for 1 hour and 20 minutes or more if needed. Let sit for 10-15 minutes before cutting into it.
.JPG) |
| Had to take this photos with my phone as my camera was missing at the moment. Sorry for the terrible quality. |
Since I'm always cooking for two I normally just carve the breasts for dinner that night and take one leg for the next day.
For Chicken Broth:
I then take the rest of the carcass remove what I can out of the cavity and pour water in a large sauce pan till the breast bone is about covered.
To the pot add :
2 Carrots
2 Stalks of celery
1 Small onion - halved.
If you saved the neck from the inside of the bird add this too for more flavor.
Salt and pepper to taste.
1. Let this mixture simmer covered for 2-3 hours.
2. Strain the broth and store in the fridge for a week of freezer for a month. I heard a great tip of freezing the broth in ice cube trays and storing the chicken broth cubes in freezer bags for when you just want to add a little chicken flavor to a dish.
Friday, April 13, 2012
Quinoa Salad with Maple Balsamic Vinaigrette

I need to spend more time than I have right now to explain what happened with the Easter ham, so, I will post about a quinoa salad that I experimented with the other day. Due to being fairly poor, I spend a lot of time deciding on how to reinvent my left overs. This process often gets too creative and doesn't work well at all. This quinoa salad however, turned out pretty well, so I'll share. A few days prior to making this salad I made something I called a warm asparagus salad. I quickly cooked one minced clove of garlic in one tablespoon of extra virgin olive oil. To that I added 8-10 diced spears of asparagus, half a diced red onion and half a yellow pepper diced. I served that mixture over spring greens. As I was only cooking for two I ended up with 1 1/2 cups of veggies left over.
I visited a good friend of mine last summer and she served a quinioa salad that involved a maple balsamic vinaigrette. It was light, refreshing and filling. Food memories stick with me a long time and here is my take on what she made that day although I can not remember what she put in it. I'll blame that on the vodka she was serving with the quinioa.
Here's what happened:
For the Quinioa:
1 Cup of Quinioa
2 Cups of Water
1/2 Tbsp of Butter
1/2 Tsp salt
For the Vinaigrette:
1/4 Tsp Ground Pepper
1/2 Tsp Kosher Salt
3 Tbsp Maple Syrup - Grade B
2 Tbsp Balsamic vinegar
1 Tbsp Olive oil
1/2 Cup of Diced carrots - I had maroon carrots on hand which added a great color.
1/2 Cup of Fresh mozerella - diced - I added this to make a little less healthy for the picky eaters to enjoy.
The vegetable mixture described above.
Salt and pepper to taste.
1. Bring water and quinoa, water, salt and butter to a boil in a medium saucepan. Stir and then lower the heat to low. Cover the pan until all the water is absorbed.
2. Add 5 tbsp of the vinaigrette to the quinoa and put it in the refrigerator.
3. As soon as the quinoa had cooled I added the cheese, the mixture of left over veggies, and the uncooked diced carrots and one more tbsp. of the vinaigrette.

The quinoa salad held up really nicely alongside a London broil I made that night.
Saturday, April 7, 2012
Easter Fresh Ham?
My mother, for the first time ever, decided to buy a fresh ham for Easter dinner. Trying to figure out what to do with it should be fun. All I know right now is I think I might need a bucket for this one. There will be documentation. Stay tuned.
Thursday, April 5, 2012
Buttermilk Almond Scones with Maple Glaze

Whatever someone originally buys buttermilk for, they are inevitably left with at least a pint extra. I purchased buttermilk to make Sunday breakfast last weekend and started brainstorming of what to do with what was left over. I was just going to make some buttermilk cornbread but I had promised a recipe involving maple syrup. This recipe is the sweet installation of my maple recipe posts. The next entry will be savory.
Buttermilk Almond Scones:
1 Cup of Flour
1/2 sliced almonds - ground
3 Tbsp of Sugar
1 Tsp of Baking powder
1 Tsp of Baking soda
6 Tbsp Butter - Salted - cut into small cubes
1/2 Cup of Buttermilk
Maple Glaze:
3/4 Cup of Confectioners sugar
2 Tbsp Heavy cream
2 Tbsp Maple Syrup
1. Preheat oven to 400 degrees
2. Take sliced almonds and grind them in food processors.
3. In large bowl sift together flour, baking powder, baking soda, sugar and salt.
4. Add sifted dry ingredients and cubes of butter into the food processor with ground almonds. Turn on until a coarse meal is formed.
5. Return the mixture to the large bowl and add buttermilk. Stir until well combined.
6. Turn dough over to a floured surface and form a circle about 1/2 inch thick and divide into 8 equal parts.
7. Bake a couple inches apart on a pan lined with parchment paper for 12-15 minutes or just until they have slightly browned.
8. While the scones are cooling whisk together all the ingredients for the glaze.
Scones taste really great while they are still slightly warm.

Tuesday, April 3, 2012
Haddock with Warm Tomato Salsa

I love cooking for myself almost as much as I love cooking for others. When I was told I was to fend for myself the other night I got excited. Cooking for fussy eaters (read : my boyfriend) can annoy me to no end. This one certain fussy eater is not fond of seafood so every time it's just me eating I go find myself a nice piece of fish to do something with. Cooking for one is fun but it can also be challenging.When I cook for one or two I almost always end up with enough to feed at least four. I think this problem is genetic because my mother, who was only ever cooking for four, always ended up with enough for eight.
The following is a light very fast dinner for two.(I made too much as always) Paired with a light wine like Pinot Grigio and you have a simple weekday dinner or a lazy Saturday night in.
1 Large Fillet of Haddock - cut in two equal parts
1 Tbsp of Butter
1 Tbsp of Extra virgin olive oil **
A few dashes of paprika per side of fish
Salt and pepper to taste
2 Tsp of Lemon juice
1 Clove of Galric - minced
1 Ripe Vine Tomato - diced
1. In a heavy bottomed frying pan on medium heat add the oil and butter.
2. Add the haddock seasoned with salt pepper and paprika. You want to make sure you hear the sizzle as soon as the fish hits the pan. If you don't hear the sizzle your pan is not hot enough. Cook fish for about 3 minutes per side. Squirt 1 tsp of lemon juice while cooking.
3. Remove fish from pan and add garlic and after about 1 minute add tomatoes. Add the second squirt of lemon juice, salt and fresh ground pepper. After 1 minute in the pan pour on top of fish.
** I often use half butter half oil. That way I get the butter flavor I want and the oil helps to avoid burning or browning the butter.
As soon as I took the fish from the pan I put it on a a bed of baby spinach. The butter, lemon, olive oil and tomatoes from the pan acted as a nice dressing.

Sunday, April 1, 2012
Marathon Maple Syrup Festival
The good news is, that I got a job! The bad news is, that I haven't had as much time to cook and document my kitchen experiences. As soon as I get my act together and back into the swing of working everyday, I will get back on the blogging track.
I haven't had as much time to cook but last last weekend, on the way to visit my parents in New Jersey, I stopped at the Marathon Maple Syrup Festival. I absolutely love small town festivals and this one was no different. As soon as I got out of my car the air was filled with the sweet smell of syrup. It being a chillier day than I had anticipated I was drawn immediately to the sign advertising maple coffee and purchased a cup.
 Coffee in hand, I looked around the festival grounds I stopped into the sugar shack. The sap straight from the maple tree does not taste very good at all. It must be boiled and treated and the sugar shack in Marathon is one of the places where this is done. The man supervising the operation told me that it had been a pretty terrible year for maple syrup. Due to the unseasonably warm weather earlier in the week they had been forced to stop tapping the maple trees sooner than usual. This year central New York had only produced about a third of the maple syrup that is normally made in a winter.

Leaving the sugar shack I was allowed to take a sample of the previously treated syrup. It was much lighter and way more flavorful than any pancake syrup on the market. (I will never go back to using Aunt Jemima.) There was more than just maple syrup and maple coffee at this festival. They had maple milkshakes, maple pulled pork and chicken, maple cotton candy, maple ice cream sundaes and of course pancake breakfasts going on until 4PM.
I loved learning more about where an ingredient comes from and how it is produced. All in all I had a great time trying all the food and being inspired to try my own maple syrup recipes. I'll make at least on thing using maple syrup for my next entry.
I haven't had as much time to cook but last last weekend, on the way to visit my parents in New Jersey, I stopped at the Marathon Maple Syrup Festival. I absolutely love small town festivals and this one was no different. As soon as I got out of my car the air was filled with the sweet smell of syrup. It being a chillier day than I had anticipated I was drawn immediately to the sign advertising maple coffee and purchased a cup.


Leaving the sugar shack I was allowed to take a sample of the previously treated syrup. It was much lighter and way more flavorful than any pancake syrup on the market. (I will never go back to using Aunt Jemima.) There was more than just maple syrup and maple coffee at this festival. They had maple milkshakes, maple pulled pork and chicken, maple cotton candy, maple ice cream sundaes and of course pancake breakfasts going on until 4PM.
I loved learning more about where an ingredient comes from and how it is produced. All in all I had a great time trying all the food and being inspired to try my own maple syrup recipes. I'll make at least on thing using maple syrup for my next entry.
 |
| Maple candies being made from maple cream, which is made by heating maple syrup and stirring until a cream is formed. I brought home some of these tasty candies for mom and dad. |
Thursday, March 22, 2012
Spice Rubbed Steak Tacos with Chipotle Cream Sauce

It was another beautifully warm day in Syracuse and I decided I wanted brave the grill. I did an inspiration stroll around the super market. This is where I walk down every aisle of the store with absolutely no clue what to make. I wanted something fresh and light where I could still cook outdoors.
A friend had mentioned steak tacos to me earlier so I picked up 1 1/4 lb of sirloin tip steak, a can of chipotle peppers and a package of soft tacos.
Here's what happened:
Rub for Steak:
2 Tbsp. Kosher salt
1 Tbsp. Coarse black pepper
1 Tsp. Onion powder
1 Tsp. Garlic powder
1-2 Dashes Cayenne pepper
Chipotle Cream Sauce:
1 7oz Can of chipotle peppers in adobo sauce
2 Cloves of garlic
1 8oz Package of sour cream
1/2 Cup of mayo
1 Tsp. Black pepper
2 Tsp. Kosher salt
1 Tbsp. Honey
Toppings:
1/2 of 1 Red onion diced.
1 Green pepper diced
1 Small tomato diced
1 cup Monterey Jack grated
1. Rub the steak with the seasoning and let sit for 30 minutes.
2. In a food processor pulse the chipotle peppers and garlic until smooth and then add the remainder of the ingredients for the sauce.
3. Heat the grill to medium/ medium high heat. - I grilled the 1/2 inch thick piece of meat I had for 7 minutes per side and got a medium piece of steak.
4. Let the steak rest and prepare/slice/dice/grate the other taco ingredients. - I put each of the ingredients in little bowls and let the taco eaters help themselves.
4. Slice the steak thin against the grain.


Tuesday, March 20, 2012
Lemon Bars

All of my roommates have been away doing various things in different parts of the country for a couple of weeks. I wanted to make a little something to welcome them all back. 'Who doesn't love coming home to baked goods,' I thought. I quickly realized, the very health conscious, medical professionals to be probably don't really care about having baked goods around the house.
But hey, more for me!
At the market the other day I picked up some very attractive lemons and thought I could make some lemon bars. I tried using Ina Garten's recipe but yet again I didn't have all the ingredients.
Here's what happened:
 Crust:
2 sticks of salted butter.
1/2 cup of sugar
2 cups of flour
1 Tsp of lemon zest. *
1 squeeze of a lemon
Filling:
6 large eggs
3 cups sugar
1/2 cup of fresh lemon juice.**
1/2 cup store bought lemon juice.
2 tsp of lemon zest
1 cup flour
Confectioner's sugar to dust on top.
1. Cream the butter and sugar in an electric mixer with the paddle attachment.
2. Sift the flour and add slowly to the butter until combined.
3. Take the dough and press it into a buttered and floured 9x13x2" baking sheet. Make sure to pressed it in as evenly as possible.
4. Set oven to 350 degrees (I stuck the pan with the crust into the freezer for just as long as it took my oven to pre-heat,10 minutes)
5. Bake for 15-20 minutes and then let cool.
6. While the crust is cooling put the whisk attachment on electric mixer and combine eggs, sugar, lemon zest, lemon juice, and flour.
7. Pour mixture on top of cooled crust and bake for 30-35 minutes.
8. Let cool before cutting and dusting with sugar.
* Why should the filling have all the lemon fun?
** 2 Large lemons gave left me with 1/2 a cup of freshly squeezed lemon juice. Thankfully I had some store bought lemon juice on hand which worked really well. These same lemons only left me with about 3 teaspoons of lemon zest. I still came out with a delightfully intense lemon flavor.
These were fairly simple and came out great with huge lemon flavor.
I would suggest for next time:
-Adding some ground ginger or fresh grated ginger to the crust for a more complex flavor. (this is what I will try next)
-Adding a thin layer of raspberry jam before adding the filling for lemon raspberry bars.(9I made my mouth water just thinking about that.)
Friday, March 16, 2012
Honey Bourbon Ginger Pork Tenderloin
Pin It
I was watching my new favorite show, Worst Cooks, and the contestants were trying to recreate one of Bobby Flay's dishes. He had made a really scrumptious looking pork tenderloin that involved a bourbon sauce. I stopped paying attention to the show as soon as I heard the word 'bourbon'. I walked into the room where the liquor is kept and picked up the bottle of Makers Mark.
I looked at the bottle with sheer determination and thought, 'I will make something with you today.'
I had chosen my ingredient and I went straight into the kitchen. I started fussing over the stove trying to make a bourbon reduction of some sort. I thought if I could figure out how to make a sweet bourbon sauce to pour over poached pears, it would be absolutely delicious. This idea quickly turned into an indestructible tar that is still in a pan soaking two days later. I stared at the black mess for a while and picked up the bottle of makers mark again and poured out 2 tablespoons into a bowl.
Here's what happened:
I marinated pork tenderloin for 6 hours in the following -
I was watching my new favorite show, Worst Cooks, and the contestants were trying to recreate one of Bobby Flay's dishes. He had made a really scrumptious looking pork tenderloin that involved a bourbon sauce. I stopped paying attention to the show as soon as I heard the word 'bourbon'. I walked into the room where the liquor is kept and picked up the bottle of Makers Mark.
I looked at the bottle with sheer determination and thought, 'I will make something with you today.'
I had chosen my ingredient and I went straight into the kitchen. I started fussing over the stove trying to make a bourbon reduction of some sort. I thought if I could figure out how to make a sweet bourbon sauce to pour over poached pears, it would be absolutely delicious. This idea quickly turned into an indestructible tar that is still in a pan soaking two days later. I stared at the black mess for a while and picked up the bottle of makers mark again and poured out 2 tablespoons into a bowl.
Here's what happened:
4 Tbsp. canola oil
1 Tsp. ginger powder
3 Tsp. honey
2 Tbsp. Bourbon
1 Tbsp. soy sauce
a dash or two of cayenne pepper.
I set the grill to a medium high heat and grilled the tenderloin on each side for 8 minutes and 2 minutes per quarter side. There are many people who say you only need 3 minutes per quarter but since my meat thermometer was on the fritz I put it on for longer. Normally, I would turn the meat evenly so that every angle of the tenderloin has grill marks until a meat thermometer reads 145 degrees. I let the pork rest off the grill for 10 minutes and then served it sliced with mashed potatoes and carrots.
The flavor of the bourbon really came through which was the whole point!

I would suggest for next time:
Instead of mashed potatoes you might want to serve with a baked sweet potato or for a healthier option, over a spinach salad.
Pin It
Tuesday, March 13, 2012
Shrimp with zucchini and spinach over linguine
Pin It
With warm weather sweeping the northeast it's hard to remember it's only March. Not too long ago, I was regressing to October, this weekend, I set the clocks an hour forward and my dinner a few months forward.
Here's what happened:
1 Lb extra large uncooked shrimp (remember to devein, no one likes shrimp poo)
3 Tbsp Butter
2 Cloves of garlic minced
1 Tsp. fresh minced parsley
1 Tbsp. lemon juice
1 Zucchini sliced in 1/2 inch circles
1 Cup spinach
1/2 Lb linguine
Extra virgin olive oil
Red pepper flakes in a pepper mill
Salt and pepper to taste
1. Set oven to 350. Set water to boil for pasta to cook while you're making the shrimp.
2. Drizzle zucchini with olive oil. Season with ground red pepper flakes, salt and pepper to taste
3. Place zucchini on a baking sheet and set to cook for 10-15 minutes. Should be done as the shrimp and pasta are done cooking.
4. In a heavy 10 inch frying pan put 2 tbsp of butter and 1 tbsp of extra virgin olive oil on medium heat.
5. Place peeled(I take the tails off), deveined shrimp around pan until pink starts to creep around the edges of the shrimp about 2 minutes and turn over(use tongs) to finish cooking, another 2 minutes.
6. Remove shrimp from pan and add to the pan 1tbsp of butter and minced garlic. Cook garlic for 2 minutes and return the shrimp to the pan. Add minced parsley and lemon juice.
7. Add pasta, zucchini and spinach to the shrimp and toss together.
 Timing and organization are important with this meal but if executed well, it should not take more than 30 minutes to put dinner together. Fresh, light, quick and most importantly, delicious.
Pin It
With warm weather sweeping the northeast it's hard to remember it's only March. Not too long ago, I was regressing to October, this weekend, I set the clocks an hour forward and my dinner a few months forward.
Here's what happened:
1 Lb extra large uncooked shrimp (remember to devein, no one likes shrimp poo)
3 Tbsp Butter
2 Cloves of garlic minced
1 Tsp. fresh minced parsley
1 Tbsp. lemon juice
1 Zucchini sliced in 1/2 inch circles
1 Cup spinach
1/2 Lb linguine
Extra virgin olive oil
Red pepper flakes in a pepper mill
Salt and pepper to taste
1. Set oven to 350. Set water to boil for pasta to cook while you're making the shrimp.
2. Drizzle zucchini with olive oil. Season with ground red pepper flakes, salt and pepper to taste
3. Place zucchini on a baking sheet and set to cook for 10-15 minutes. Should be done as the shrimp and pasta are done cooking.
4. In a heavy 10 inch frying pan put 2 tbsp of butter and 1 tbsp of extra virgin olive oil on medium heat.
5. Place peeled(I take the tails off), deveined shrimp around pan until pink starts to creep around the edges of the shrimp about 2 minutes and turn over(use tongs) to finish cooking, another 2 minutes.
6. Remove shrimp from pan and add to the pan 1tbsp of butter and minced garlic. Cook garlic for 2 minutes and return the shrimp to the pan. Add minced parsley and lemon juice.
7. Add pasta, zucchini and spinach to the shrimp and toss together.

Pin It
Wednesday, March 7, 2012
Stracciatella Soup
Pin It
I'm working with a very small budget these days; I made a promise to myself that I would not eat out for lunch. Yesterday I walked into the kitchen hungry for lunch. I took a mental note of the ingredients I had on hand and there didn't seem to be anything easy to make. This is when I look at a full refrigerator and pantry and think, 'man, there's nothing to eat'. I was afraid I would have to break another promise to myself when I had an 'a ha!' moment.
I realized that I had the chicken broth made from my Sunday roast chicken(I will post this recipe soon), eggs, Pecorino Romano, and baby spinach.
Eureka! I'll make stracciatella soup! - Don't worry I had trouble pronouncing this at first too.
My former boss and mentor is the one who got me hooked on this simple and extremely comforting, delicious soup. I would get it often from the local pizzeria and this is my take on it.
5 cups of chicken broth - homemade broth brings this soup the extra mile.
2 eggs
1/2 cup of Pecorino Romano(I love to grate my own but most often use pre-grated Locatelli)
2-3 handfuls of baby spinach
Salt and pepper to taste
optional: fresh Italian Parsley
1. Bring the chicken broth to a soft boil in a medium sauce pan.
2. Whisk eggs and grated cheese together. Add finely chopped parsley to egg mixture.
3. Drop egg mixture in hot broth with baby spinach.
4. Stir and let cook. The eggs and spinach cook almost instantly and you're left with a great soup.
I love to serve this soup with a little cheese and fresh grated pepper on top. The whole process took ten minutes. Lunch doesn't get much easier than this and I didn't have to break my promise.

I would suggest for next time:
Having this soup with some good Italian bread.

Pin It
I'm working with a very small budget these days; I made a promise to myself that I would not eat out for lunch. Yesterday I walked into the kitchen hungry for lunch. I took a mental note of the ingredients I had on hand and there didn't seem to be anything easy to make. This is when I look at a full refrigerator and pantry and think, 'man, there's nothing to eat'. I was afraid I would have to break another promise to myself when I had an 'a ha!' moment.
I realized that I had the chicken broth made from my Sunday roast chicken(I will post this recipe soon), eggs, Pecorino Romano, and baby spinach.
Eureka! I'll make stracciatella soup! - Don't worry I had trouble pronouncing this at first too.
My former boss and mentor is the one who got me hooked on this simple and extremely comforting, delicious soup. I would get it often from the local pizzeria and this is my take on it.
5 cups of chicken broth - homemade broth brings this soup the extra mile.
2 eggs
1/2 cup of Pecorino Romano(I love to grate my own but most often use pre-grated Locatelli)
2-3 handfuls of baby spinach
Salt and pepper to taste
optional: fresh Italian Parsley
1. Bring the chicken broth to a soft boil in a medium sauce pan.
2. Whisk eggs and grated cheese together. Add finely chopped parsley to egg mixture.
3. Drop egg mixture in hot broth with baby spinach.
4. Stir and let cook. The eggs and spinach cook almost instantly and you're left with a great soup.
I love to serve this soup with a little cheese and fresh grated pepper on top. The whole process took ten minutes. Lunch doesn't get much easier than this and I didn't have to break my promise.

Having this soup with some good Italian bread.
Pin It
Friday, March 2, 2012
Pumpkin scones
O.K.! I know everyone must be thinking, 'aren't you a little late?'.
I'm well aware that the wonderful time of year when the pumpkin spice latte returns to Starbucks is over. I just can't let go of the great favor of pumpkins, so today, I made pumpkin scones.
Here's what happened:
I followed the recipe from the link above. The dough ended up being way too dry so I added more puree, about 1/4 a cup. She recommended using parchment paper to line the baking sheets. I didn't have any on hand; I thought I might be on my way to another baking disaster but they came right off after 15 minutes in the oven. Unfortunately I left my cooling racks in New Jersey. My solution was to use one of the racks from the oven to cool the scones. I decided to not use her glaze and improvised.
1 cup of confectioners sugar.
1/2 tsp. of allspice.
2 Tbsp. half and half.
I would suggest for next time:
Making your own pumpkin puree.
Omit glaze altogether and eat with a little pumpkin butter instead.
Serving these scones with ginger or cinnamon tea.
I'm well aware that the wonderful time of year when the pumpkin spice latte returns to Starbucks is over. I just can't let go of the great favor of pumpkins, so today, I made pumpkin scones.
Here's what happened:
I followed the recipe from the link above. The dough ended up being way too dry so I added more puree, about 1/4 a cup. She recommended using parchment paper to line the baking sheets. I didn't have any on hand; I thought I might be on my way to another baking disaster but they came right off after 15 minutes in the oven. Unfortunately I left my cooling racks in New Jersey. My solution was to use one of the racks from the oven to cool the scones. I decided to not use her glaze and improvised.
1 cup of confectioners sugar.
1/2 tsp. of allspice.
2 Tbsp. half and half.
 |
These scones brought me right back to October!
|
Making your own pumpkin puree.
Omit glaze altogether and eat with a little pumpkin butter instead.
Serving these scones with ginger or cinnamon tea.
Tuesday, February 28, 2012
Library Visit
While home in Montclair, NJ, I stopped in the main library, to return a few books which were obscenely over due. As always, I ended up in the cookbook section. I took home three books: The Cuisine of the Rose by Mireille Johnston, Le Cordon Bleu Classic French Cookbook* and, Comfort Me With Apples by Ruth Reichl

The first two books I chose because, I'm a francophile. The obsession probably started when my kindergarten teacher, Mrs. Bulkin, made us kids imitate french impressionism masterpieces. I remember being so proud when my mother hung up my Cray-Pas version of Monet's lilies on the refrigerator. French impressionism made me think that France was a magical, dream-like place. The last book I chose because of how much I loved Mrs. Reichl's first book, Tender at the Bone. She made me appreciate my food memories while making me think about food completely differently. I plan on making one recipe from each book and sharing here. I don't know about you but, I'm excited!

The first two books I chose because, I'm a francophile. The obsession probably started when my kindergarten teacher, Mrs. Bulkin, made us kids imitate french impressionism masterpieces. I remember being so proud when my mother hung up my Cray-Pas version of Monet's lilies on the refrigerator. French impressionism made me think that France was a magical, dream-like place. The last book I chose because of how much I loved Mrs. Reichl's first book, Tender at the Bone. She made me appreciate my food memories while making me think about food completely differently. I plan on making one recipe from each book and sharing here. I don't know about you but, I'm excited!
I would suggest for next time:
Reading Tender at the Bone.
See what cookbooks are in your local library.
*Julia Child attended Le Cordon Bleu.(I know that's Meryl Streep)
Thursday, February 23, 2012
You must read the whole recipe.
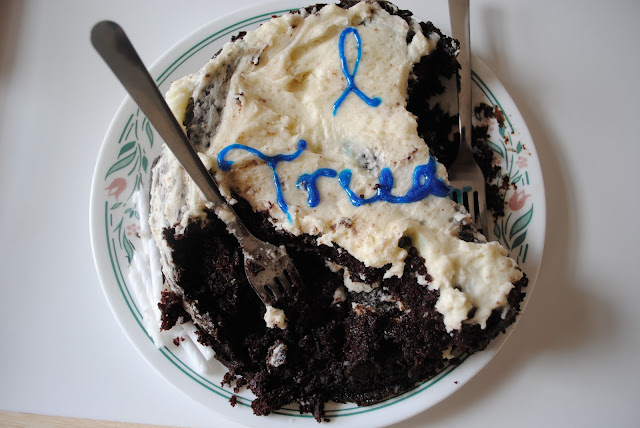
Yesterday was was my sweetheart's birthday and I decided to make him a cake. For all birthdays and other special occasions my future mother-in-law bakes a cake: a chocolate cake that deceivingly bears all the hallmarks of a normal homemade double layer cake. Paired with Eight O'Clock coffee and good company her cake makes for the perfect heavenly dessert. It is gloriously rich, moist and diabetes inducing.
I got an Ina Garten recipe that looked simple enough and headed to the store for ingredients. I wouldn't say baking is my strong suit but I'm not a hopeless baker either. Yesterday's endeavor proved I might be slightly more hopeless than I thought.
Here's what happened.
I followed the recipe exactly or, so I thought before the kitchen filled with smoke and the bitter smell of burnt confection. Having recently moved into a new house, I don't have all of my cooking equipment with me. I had to use the one use aluminum cake tins from the super market. I missed in the recipe where Ina specifies to use cake tins of the 2" deep variety. Everyone makes mistakes and my mistake resulted in two smoking rings of chocolate mess at the bottom of the oven where the cake had overflowed.
"Shit"
Emergency mode ensued; doors were opened and I was on all fours with a rubber spatula(that's all they had) scraping the dried, crispy, lava mess out of the oven to the floor. I figure the actual cakes are still OK and leave them in to finish baking. They didn't look so bad when I took them out, a little lop-sided, not so bad. While I let them cool for 45 minutes, as suggested, I made the butter cream frosting. Tip- cream the sugar first and add the confectioners sugar really slowly: a few tbsp. at a time. I take the cake out of the first tin and half of it stays in the mold.
"Shit"
Keeping my wits about me I think 'that's OK Dai, just mold it back together'. I try to frost the layer but the cake is breaking apart and looking even worse. Taking the second layer out of its tin is sort of a disaster too and I am left with the saddest layer cake I've ever seen. I frost what I can and bring it to the birthday boy.
His exact quote?
"What happened?"
My response?
"So much."
After laughing for a while, he provided me with the secret to his mom's cake. She uses spring form pans and makes the cake the day before frosting it! So the cake may not have turned out how it was going to in my head but it did taste great. I will be trying this again.
I would suggest for next time:
Using the correct sized pan.
Waiting at least a few hours before frosting the cake.
Adding some almond extract to the butter cream frosting for a slightly different taste.
I got an Ina Garten recipe that looked simple enough and headed to the store for ingredients. I wouldn't say baking is my strong suit but I'm not a hopeless baker either. Yesterday's endeavor proved I might be slightly more hopeless than I thought.
Here's what happened.
I followed the recipe exactly or, so I thought before the kitchen filled with smoke and the bitter smell of burnt confection. Having recently moved into a new house, I don't have all of my cooking equipment with me. I had to use the one use aluminum cake tins from the super market. I missed in the recipe where Ina specifies to use cake tins of the 2" deep variety. Everyone makes mistakes and my mistake resulted in two smoking rings of chocolate mess at the bottom of the oven where the cake had overflowed.
"Shit"
Emergency mode ensued; doors were opened and I was on all fours with a rubber spatula(that's all they had) scraping the dried, crispy, lava mess out of the oven to the floor. I figure the actual cakes are still OK and leave them in to finish baking. They didn't look so bad when I took them out, a little lop-sided, not so bad. While I let them cool for 45 minutes, as suggested, I made the butter cream frosting. Tip- cream the sugar first and add the confectioners sugar really slowly: a few tbsp. at a time. I take the cake out of the first tin and half of it stays in the mold.
"Shit"
Keeping my wits about me I think 'that's OK Dai, just mold it back together'. I try to frost the layer but the cake is breaking apart and looking even worse. Taking the second layer out of its tin is sort of a disaster too and I am left with the saddest layer cake I've ever seen. I frost what I can and bring it to the birthday boy.
His exact quote?
"What happened?"
My response?
"So much."
After laughing for a while, he provided me with the secret to his mom's cake. She uses spring form pans and makes the cake the day before frosting it! So the cake may not have turned out how it was going to in my head but it did taste great. I will be trying this again.

I would suggest for next time:
Using the correct sized pan.
Waiting at least a few hours before frosting the cake.
Adding some almond extract to the butter cream frosting for a slightly different taste.
Tuesday, February 21, 2012
Exploring endives.
I enjoy eating vegetables.
 I ripped the roots off the greens and put them to boil for 20 minutes. I like to peel the skin off with my hands under cold water; it feels, primal. After boiling, the skin will come right off; this leaves your hands looking as if you just did something grizzly. (Think shower scene from Psycho.) I diced up the beets and cucumber and ran under cold water. Dressed the veggies with a squirt of lemon juice, salt and pepper to taste and spooned the mixture on to the endive. I poured on a little bit of extra virgin olive oil and sprinkled some Parmesan cheese on top.

I want to enjoy eating vegetables.
I really should eat more vegetables.
Stated above is the thought process that usually overcomes me while in the produce department of the supermarket. A process, that usually, ends with me picking up a head of broccoli and calling it a side dish. There is nothing wrong with some steamed broccoli on the side of a tender steak but, holy moley, how boring can we get here?
Last night I tried to be a little more inspired. When I'm in the supermarket things have voices, not in a, 'you should see someone about that' way, just certain ingredients will shine brighter than others. The endives were calling me.
Have I ever used an endive? Have I ever eaten an endive? The answer to both those questions being, no, i wasn't sure how the endive knew my name but, it did. Going from there, I picked up up an especially nice bushel of beets, a cucumber and a lemon.
Here's what happened:
I ripped the roots off the greens and put them to boil for 20 minutes. I like to peel the skin off with my hands under cold water; it feels, primal. After boiling, the skin will come right off; this leaves your hands looking as if you just did something grizzly. (Think shower scene from Psycho.) I diced up the beets and cucumber and ran under cold water. Dressed the veggies with a squirt of lemon juice, salt and pepper to taste and spooned the mixture on to the endive. I poured on a little bit of extra virgin olive oil and sprinkled some Parmesan cheese on top.
The endive was crisp, bright and bitter against the delicate sweetness and clean taste of the cucumber.
I will be experimenting with endives more in the future but the beets are what really grabbed my attention here. They are a really great veggie. I saved the beet greens to have an adventure with them later.
I will be experimenting with endives more in the future but the beets are what really grabbed my attention here. They are a really great veggie. I saved the beet greens to have an adventure with them later.
I would suggest for next time:
Adding apples would add a really nice sweetness.
Serve as an hors d'oeuvre.
Omit Parmesan, sprinkle goat cheese on top.
Use the same mixture but over baby spinach for a nice salad.
Monday, February 20, 2012
An introduction.
I thought that perhaps today would be the day that I would start writing more. I have a certain anxiety when it comes to putting pen to paper and, the only way I can think to combat said anxiety, is to make a mockery of it by writing as often as I can.
Evidently this thought has crossed my mind before because when I entered 'blogger' into the Google tab of Chrome, it automatically came up with this previously constructed blog. I found, to my horror, that I also must of lacked all imagination then and named this blog, All in a Dai's work. It is really upsetting to me that I thought that was cute or something at one point.
Anyway, apologies to everyone for the corniness, but it stays.
I'm currently unemployed and trying to figure out what I want to be doing with my life. So, in the meantime, I'll cook, bake, knit, crochet, find bodies of water, and walking trails and document some of it.
I'm off to cook.
Subscribe to:
Posts (Atom)